


In this article, we dive into the incubation of mushroom spawn—one of the most essential steps in mushroom cultivation. When done right, this process can lead to impressive results and a rich harvest.
Curious how to get the most out of your incubation for maximum yield? Keep reading and discover key tips and techniques to make your mushroom grow a success!
Table of Contents
What is mushroom spawn incubation?
During the incubation phase, a specific fungus added to the substrate during inoculation gets the chance to colonize it fully.
To make sure this process runs smoothly, it’s important to create the right conditions. In practice, that mostly means keeping the right temperature and minimizing light exposure. On top of that, each species has its own needs when it comes to CO₂ levels and humidity.

The right incubation temperature
Temperature is the most important factor during the incubation process. Keep in mind that the ideal temperature varies depending on the mushroom species.
For example, Psilocybe cubensis mushrooms thrive at an incubation temperature of 26–28°C. At this range, colonization proceeds quickly and other microorganisms have less of a chance to develop.
Want to know the ideal incubation temperatures for different mushroom species? Check out the list below.
Incubation temperatures for different mushroom species
| Mushroom species | Ideal incubation temperature (°C) |
|---|---|
| Agaricus bisporus (White button mushroom) | 22–25°C |
| Pleurotus ostreatus (Oyster mushroom) | 24–28°C |
| Lentinula edodes (Shiitake) | 21–24°C |
| Ganoderma lucidum (Reishi) | 24–30°C |
| Hericium erinaceus (Lion’s Mane) | 21–24°C |
| Flammulina velutipes (Enoki) | 22–24°C |
| Coprinus comatus (Shaggy ink cap) | 22–26°C |
| Psilocybe cubensis | 26–28°C |
| Volvariella volvacea (Straw mushroom) | 28–35°C |
| Hypsizygus tessellatus (Shimeji) | 22–26°C |
Incubation in the dark
Besides temperature, darkness is another key factor when incubating mushroom spawn. Light can trigger fruiting, so it’s crucial to expose the mycelium to as little light as possible. After all, we only want to initiate fruiting once the substrate is fully colonized.

How to create a suitable incubation space
There are several ways to create a good incubation environment. As mentioned before, the space needs to meet two basic requirements: warm enough (but not too warm!) and dark (or at least dim).
The simplest way to achieve this is by heating a room and preparing it for incubation. For example, you can place your spawn jars or bags in a closet. This is a straightforward solution, but not the most energy-efficient—especially if you’re aiming for around 27°C for optimal colonization speed.
A better option is to maintain a sealed, temperature-controlled space. Ideally, it should be large enough, well-insulated, and block out all light. It’s also important to keep the spawn away from direct heat sources, since that can cause condensation inside jars or bags, which could harm the mycelium.
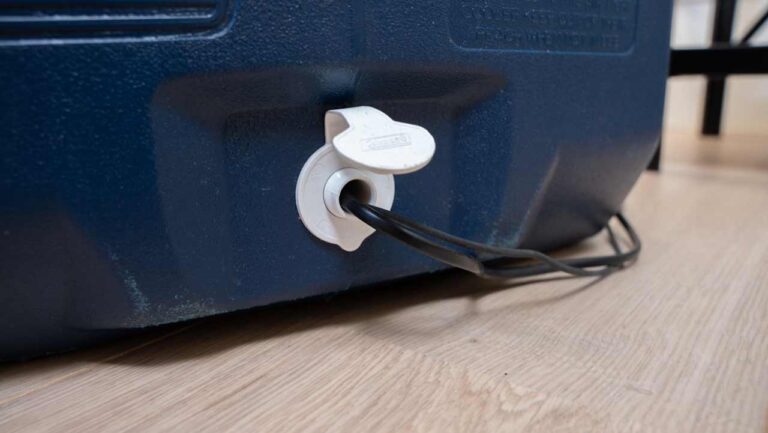
As you’ll see below, we converted a large cooler into an incubator, and it works great for us. We use a large heat mat combined with a thermostat. The wiring runs through the cooler’s vent to the outside.
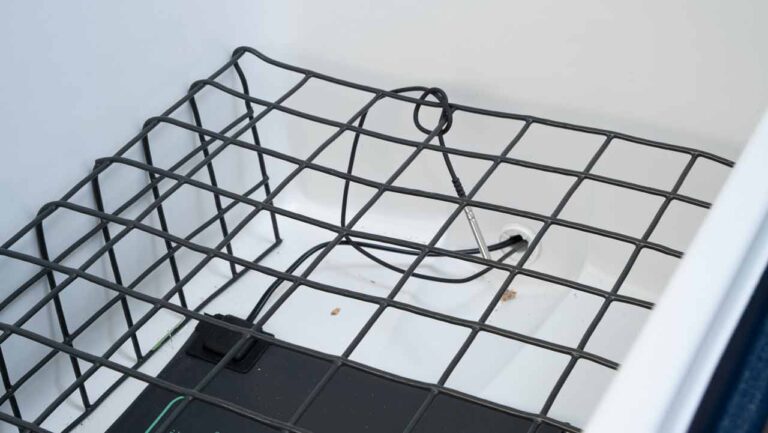
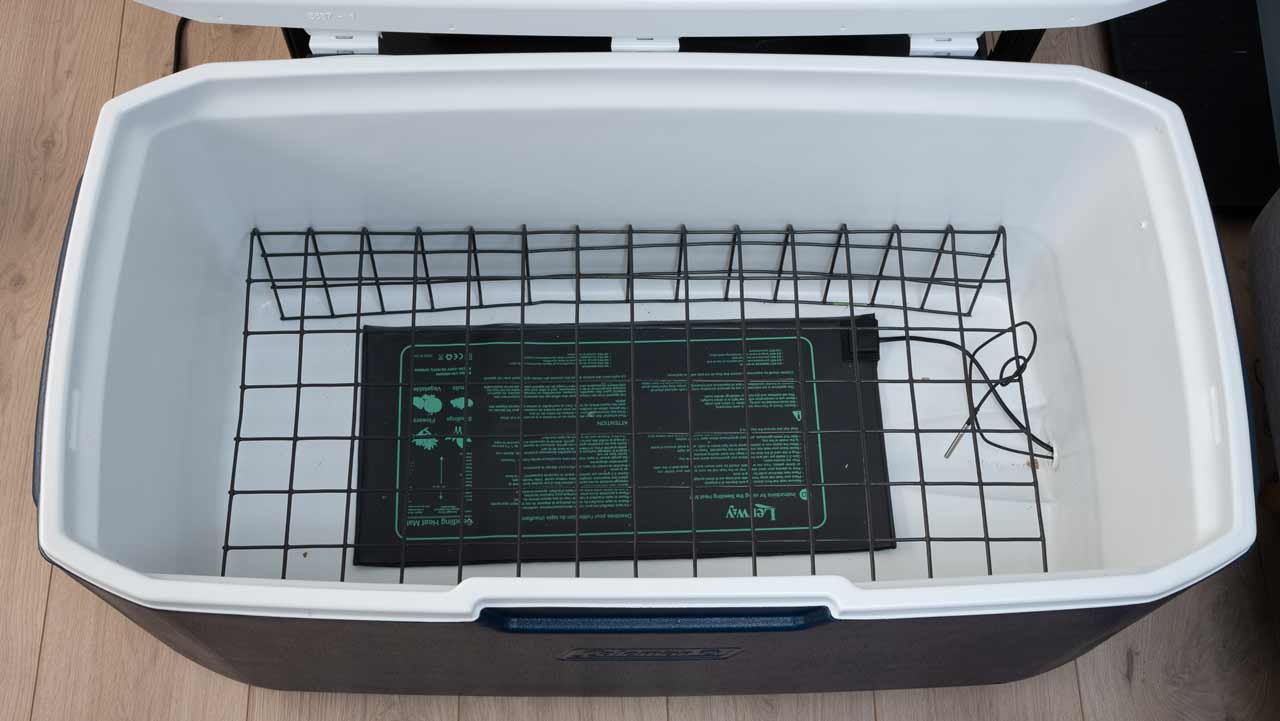
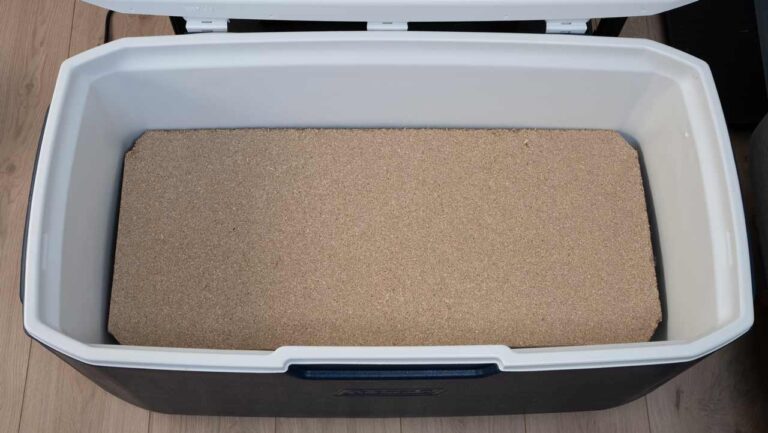
To keep the spawn from sitting directly on the heat source, we bent a piece of sturdy garden mesh into a platform. We also placed a wooden board on top to diffuse the heat from the mat as much as possible.

How the colonization process progresses during incubation
To give you an idea of how colonization unfolds, we took daily photos. On day one after inoculation, there was no visible growth yet, so we started photographing from day two.
We set our incubator to 27°C. On day five, we shook the mushroom spawn, and by day eleven, the substrate was fully colonized.
Shaking mushroom spawn: should you do it or not?
Shaking mushroom spawn is a commonly used technique during incubation, but it’s not strictly necessary. We prefer it because it fits our workflow and speeds up the colonization process.
Typically, spawn is shaken when about 25–30% of the substrate has been colonized. By breaking up the colonized grain and mixing it with the uncolonized portion, the mycelium is redistributed more evenly—resulting in faster colonization overall.
There is one case where we always recommend shaking: when using agar wedges. These wedges can’t be evenly distributed through the substrate during inoculation. Shaking later on helps spread the mycelium properly.
With liquid culture, this issue doesn’t occur. In fact, when using this method, you can shake the grain right after inoculation to ensure even distribution from the start.
How to shake mushroom spawn?
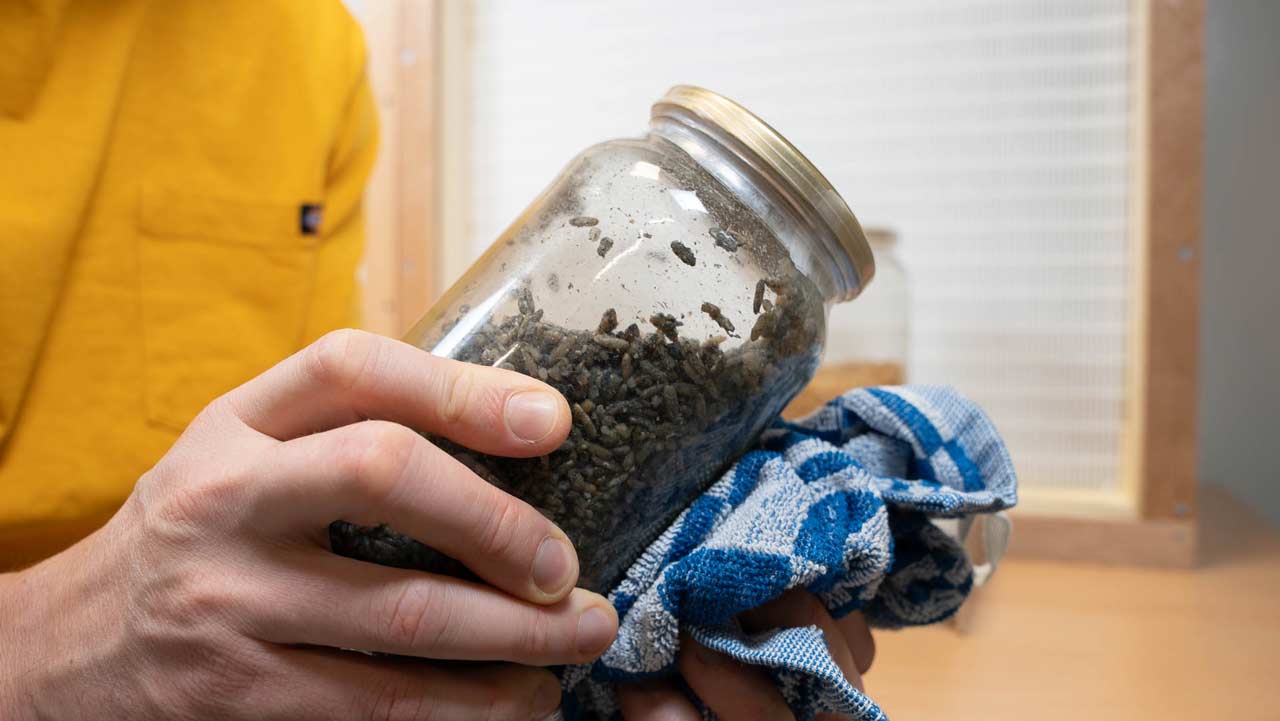
If you’re using glass jars to grow your mushroom spawn, it’s always smart to wear sturdy gloves while shaking. Jars can sometimes break, and the last thing you want is a handful of sharp glass.
Instead of slapping the jar against your palm, it’s safer and easier to use a soft surface. For example, hit the jar against a folded towel or a bicycle tire held in your hand. This helps prevent injury and gives you more control.
If you’re using spawn bags, shaking is much simpler. You just need to break up the colonized parts and mix them with the uncolonized grains.
My spawn is fully colonized — what’s next?
Once your mushroom spawn is fully colonized, it’s time for the next step. There are a few different ways you can proceed.
One option is to use the spawn to colonize a bulk substrate. This method takes more time but usually results in a higher mushroom yield.
Another option is to shake the grains and spread them into a tray. Then you apply a casing layer to prevent drying out. After that, you can immediately create the right conditions to trigger fruiting.
Whichever route you choose — good luck and have fun with your grow!