Traditional grain spawn preparation usually involves soaking, simmering and drying the grain before sterilization. With the No Soak, No Simmer (NSNS) technique, most of these steps can be skipped by adding the correct amounts of dry millet and water directly to the jar (or bag). This makes the process considerably easier, with less preparation work and fewer things to clean up afterwards.
We’ve been using this method for several years now, and it has become our preferred way of preparing millet grain spawn. However, we’ve made one small adjustment to the original technique that has consistently improved our results. Rather than skipping the soaking stage entirely, we let the millet sit in the water for 12–24 hours before sterilization.
In our experience, this allows the grain to hydrate more evenly, resulting in fewer burst kernels and a more reliable sterilization process.
In this guide, we’ll show you how we prepare millet grain spawn using our slightly modified NSNS technique, which requires minimal equipment and very little hands-on preparation.
Table of Contents
What is the No Soak, No Simmer Tek?
The No Soak, No Simmer (NSNS) Tek is a grain preparation method that removes the traditional cooking step. Instead of soaking, simmering and drying the grain before sterilization, dry millet and a measured amount of water are placed directly into each jar. During sterilization, the millet absorbs the water and cooks inside the jar itself.
This approach has several advantages. It saves time, requires less equipment and produces very little mess because there is no need to drain or dry cooked grain. Since every jar receives exactly the same amount of millet and water, the results are also highly consistent from batch to batch.
Why choose millet for grain spawn?
Millet has become one of the most popular grains for mushroom cultivation, and for good reason.
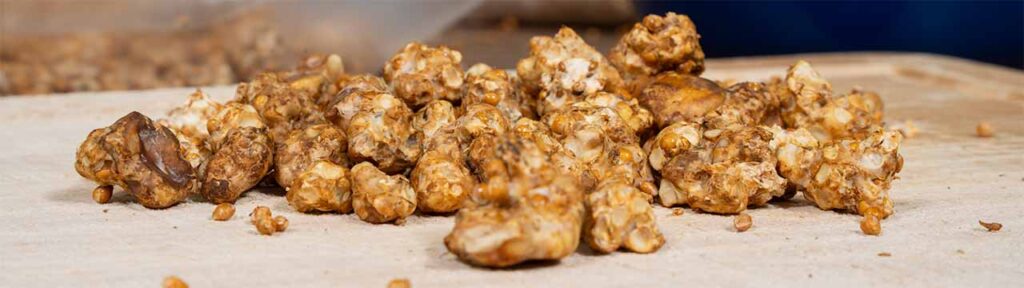
Unlike larger grains such as rye or wheat, millet consists of thousands of tiny kernels and each of them becomes an individual inoculation point once colonized by mycelium. When the grain spawn is mixed with bulk substrate, these numerous inoculation points allow the mycelium to spread quickly and evenly throughout the substrate.
Although rye, wheat and brown rice all produce excellent grain spawn, millet remains our personal favorite because of its simplicity, consistency and high inoculation point density.
How much millet and water should you use?
For one 1-litre jar we use:
- 300 grams of dry millet
- 170 grams (170 ml) of water
For the particular millet we use, this ratio consistently produces well-hydrated grain with very few burst kernels.
Keep in mind that different types of millet don’t all behave exactly the same. Dry millet already contains a certain amount of moisture, and this can vary depending on the variety, brand, growing region and storage conditions. Combined with differences in kernel size, this means the ideal water ratio may vary slightly from one batch of millet to another.
We recommend starting with the 300 g millet to 170 g water ratio and making small adjustments after your first batch if necessary.
Which millet should you use?
One of the great things about millet is that almost every variety performs well as mushroom grain spawn.
White, yellow and red millet all have very similar properties and generally produce comparable colonization results. So instead of searching for a specific variety, simply choose whichever type is easiest to find or offers the best value in your area.
Whenever possible, select clean millet with very little dust or debris. Organic millet is a nice option if readily available, although it’s certainly not required for successful grain spawn production.
What you'll need for the millet NSNS Tek
Before getting started, gather the following equipment:
Required
- Millet
- Clean water
- Jars with filter-fitted lids
- Measuring cup
- Scale
- Pressure cooker or autoclave
Optional
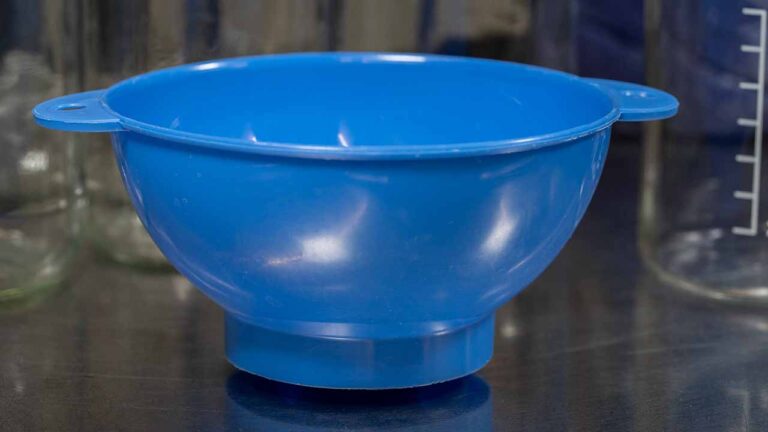
- Jar funnel
- Heat-resistant gloves


Steps for making millet grain spawn
Step 1 – Prepare your jars
Start by preparing your jars and lids.
If your lids don’t already contain filters, drill the required holes and install the filters according to your preferred design. If you plan to inoculate using liquid culture or spore syringes, you may also want to install self-healing injection ports.
Preparing all your jars beforehand makes the remainder of the process much faster.
Step 2 – Add the millet
Place an empty jar on your scale and add 300 grams of dry millet.
If you have a jar funnel, use it to make filling easier and reduce spills. Repeat this process until all jars have been filled.
Step 3 – Add the water
Add 170 grams (170 ml) of clean tap water to each jar. If your tap water contains high levels of chlorine, it may be better to use bottled water instead.
Try to keep the amount of water as consistent as possible across every jar, as this helps produce predictable results after sterilization.
Step 4 – Soak the millet
Using a clean spoon, gently stir the millet until all kernels are in contact with the water. We recommend stirring rather than simply swirling the jar, as millet kernels often stick to the sides of the glass and may not hydrate evenly otherwise. Attach the lids and allow the jars to soak for 12–24 hours.
We usually prepare the jars in the afternoon and sterilize them the following day.
Although soaking isn’t part of the original NSNS method, we’ve found several advantages.
First, soaking encourages bacterial endospores to germinate before sterilization. These germinated endospores are much easier to destroy during pressure cooking than dormant spores.
Secondly, the millet absorbs a significant portion of the water before sterilization. This results in more evenly hydrated grain and noticeably fewer burst kernels.
Since soaking requires almost no additional work, we consider it a worthwhile improvement to the original method.
Step 5 – Sterilize the jars
Once soaking is complete, load the jars into your pressure cooker or autoclave.
When the pressure reaches 15 PSI, begin timing the sterilization cycle. For 1-litre jars we recommend sterilizing for 90–120 minutes.
If you’re preparing millet in filter bags rather than jars, you’ll generally need longer sterilization times because each bag contains a larger volume of grain. Depending on the bag size, an additional 60–90 minutes may be required.
When sterilization is complete, allow the pressure cooker to cool naturally. Never force the pressure down by opening the valve or rapidly cooling the cooker.
Step 6 – Break up the grain
Once the pressure has completely returned to normal, carefully remove the jars from the pressure cooker while wearing heat-resistant gloves. Both the jars and their contents may still be extremely hot.
Inspect each jar for cracked glass or damaged filters before continuing. If a jar is damaged, set it aside and do not tap or shake it.
For the remaining jars, the next step is to loosen the grain. During sterilization, the millet will have expanded and become compacted. While the jars are still warm, gently tap them against a folded towel or other padded surface to loosen the kernels. This prevents the grain from settling into large clumps as it cools and makes inoculation and later shaking much easier.
Why do jars sometimes break?
We’ve noticed that jars are slightly more prone to breaking when preparing millet compared with grains that are fully hydrated before sterilization.
This is most likely because the millet continues absorbing water while pressure cooking, causing the grain to expand inside the jar and place additional stress on the glass.
To reduce the risk:
- Use good quality canning jars.
- Avoid damaged or chipped glass.
- Don't overfill the jars.
- Allow the pressure cooker to cool naturally.
- Handle hot jars carefully.
During the photo session for this guide, we actually broke the bottom out of one jar, as shown in the photo above. Fortunately, this doesn’t happen often, but it does illustrate that it can occasionally occur.
Inoculating your millet grain spawn
Once the jars have cooled completely to room temperature, they’re ready for inoculation.
Several inoculation methods work well with millet:
- Liquid culture syringe
- Agar wedges
- Grain-to-grain (G2G) transfers
- Spore syringe
Liquid culture is usually the fastest and easiest option because living mycelium is introduced directly into the grain. Agar transfers are also highly reliable and allow cultures to be checked for contamination before inoculation. Grain-to-grain transfers are extremely fast when clean colonized grain is already available.
Spore syringes work perfectly as well but generally colonize more slowly because the spores first need to germinate before mycelium begins to grow.
After inoculation, incubate the jars at the appropriate temperature for the mushroom species you’re growing. Once approximately 25-30% of the grain has colonized, shake the jars thoroughly to redistribute the colonized kernels. This dramatically speeds up complete colonization.
Frequently Asked Questions
Can I skip soaking?
Yes. The original NSNS Tek doesn’t include soaking. However, we recommend soaking for 12–24 hours because we’ve consistently observed more even hydration and fewer burst kernels.
Can I use bird seed millet?
Yes, provided it’s primarily clean millet without unnecessary additives or excessive debris.
Can I use filter bags instead of jars?
Absolutely. The method works well with both jars and filter bags, although larger bags usually require longer sterilization times. In our experience, filter bags tend to produce more burst kernels than jars, possibly because the rigid glass walls promote more even heat distribution and help keep the grain evenly packed during sterilization.
Why are my kernels bursting?
Burst kernels are typically caused by excessive moisture, overly long sterilization times or natural variation between different millet varieties.
Why is my grain too wet?
Small amounts of condensation are completely normal immediately after sterilization. If the jars remain overly wet after cooling, reduce the water slightly for your next batch.
Conclusion
The No Soak, No Simmer Tek is one of the easiest and most reliable methods for preparing millet grain spawn. By eliminating unnecessary cooking steps and combining the process with a simple overnight soak, it’s possible to produce consistently hydrated grain with very little effort.
Once you’ve found the ideal water ratio for your particular millet, the process becomes highly repeatable and easy to scale. Whether you’re preparing a handful of jars at home or larger batches for regular cultivation, this method provides an excellent balance between simplicity, consistency and performance.