Looking for a cheap and easy way to make mushroom spawn? Uncle Ben’s Tek offers a simple solution. Popularized in 2019 by Reddit user Shroomscout, the method quickly gained popularity among home mushroom growers.
In this guide, we’ll explain how Uncle Ben’s Tek works, take you through the process step by step, and discuss what to look out for along the way.
Table of Contents
What is the Uncle Ben’s Tek?
Uncle Ben’s Tek is a simple DIY method for making mushroom spawn using pre-steamed rice bags from the supermarket. Developed in 2019 by Reddit user Shroomscout, the technique quickly spread through communities such as Reddit and Shroomery, where home growers shared their experiences and results.
The method typically uses pre-steamed brown rice, such as Uncle Ben’s Ready Rice, which is widely available in supermarkets. Because the rice is already cooked, sterile-packed and contains the nutrients needed for mycelium growth, it can be used directly as a substrate without preparing or sterilizing grain yourself.
The process itself is straightforward: the rice is inoculated with spores or liquid culture and then left to colonize. Under the right conditions, the mycelium gradually grows throughout the rice. Once fully colonized, the contents of the bag can be used as spawn for further cultivation.
Thanks to its low barrier to entry and the fact that no pressure cooker or other sterilization equipment is required, Uncle Ben’s Tek has become a popular and accessible method within the mushroom-growing community.
What are the pros and cons of Uncle Ben’s Tek?
Although Uncle Ben’s Tek is a simple and beginner-friendly way to make mushroom spawn, it also comes with a number of drawbacks. The method requires little equipment and preparation, but offers less control over factors such as moisture, sterility and consistency compared with more advanced grain spawn methods.
The table below provides an overview of the main advantages and disadvantages, making it easier to decide whether Uncle Ben’s tek is the right method for you.
| Pros | Cons |
|---|---|
| ✅ Simple and accessible – no expensive or complex equipment needed. | ⚠️ Higher risk of contamination compared to professionally sterilized grains or lab-based techniques. |
| ✅ Uses ready-to-eat pre-steamed rice from the supermarket. | ⚠️ Limited yield – the small amount of rice per packet restricts the amount of spawn, and therefore the final harvest. |
| ✅ Quick to start – no preparation or cooking required. | ⚠️ Not always consistent – different rice brands or formulations can lead to varying results. |
| ✅ Ideal for beginners who want to experiment with making spawn. | ⚠️ Difficult to shake the spawn to speed up colonization. |
| ✅ Requires very little – just a syringe with spores or liquid culture, a warm environment, and some patience. | ⚠️ Hard to monitor – the packets are often only partly transparent, making it difficult to track progress. |
| ✅ Discreet and easy to obtain – the packets look like regular food rather than cultivation material. | ⚠️ Creates relatively more plastic waste – since each packet contains only about 250 grams, you’ll often need several. |
How to use the Uncle Ben’s Tek
Uncle Ben’s tek is relatively simple and requires only a few basic materials. With a clean workspace and the right supplies, you can prepare your rice bags for inoculation without any specialized sterilization equipment.
Below, you’ll find an overview of the materials you need, followed by a clear step-by-step guide to the entire process.
Materials
Essential
- Packet(s) of pre-steamed rice
- Liquid culture or spore syringe
- Micropore tape
- Scissors
Recommended
- Disinfectant or alcohol wipes
- Hand sanitizer or isopropyl alcohol
- Nitrile gloves
- Face mask
- Warm space or incubator
- SAB (Still Air Box) or laminar flow hood
Step-by-step guide
1. Clean and organize your workspace and supplies
Choose a quiet workspace with minimal airflow, such as a small, enclosed room. Avoid open windows, fans or other sources of moving air, as these can increase the risk of contamination. If you have a still air box (SAB) or laminar flow hood, use it to create a cleaner working environment.
Thoroughly clean your work surface with disinfectant or alcohol wipes, and gather all the supplies you’ll need before you begin. Arrange everything so it is easy to access without getting in the way while you work. A clean and organized workspace helps minimize contamination and makes the inoculation process easier.
2. Massage the rice bags and push the rice down
Before inoculation, make sure all the rice is collected at the bottom of the bag. Gently massage the bag to loosen any compacted rice and carefully push the grains downward. This creates a more even mass of rice for the mycelium to colonize.
Be careful not to crush or damage the grains while doing this. Keeping the rice intact helps maintain good conditions for even and healthy mycelial growth.
3. Prepare for inoculation
Good preparation and hygiene are essential for minimizing the risk of contamination. Start by disinfecting your gloves with alcohol or another suitable disinfectant. Then, wipe down the outside of the rice bag, paying particular attention to the area where you will inject.
If your syringe comes with a protective cap, carefully remove it and attach the provided needle. Avoid touching the needle or allowing it to come into contact with any surfaces. If this happens, flame-sterilize the needle with a lighter or burner before continuing.
Finally, make sure all your materials are within easy reach and that you are still working in a clean, draft-free environment. Once everything is prepared, you are ready to inoculate the rice bag.
4. Inject the spores or liquid culture and seal the bag
Once everything is clean and ready, you can begin inoculating the rice bag. Carefully pierce the packaging with the needle and inject two to three milliliters of liquid culture or spore solution into the rice. Inject the solution gradually to help distribute it throughout the bag.
Carefully withdraw the needle and immediately cover the injection hole with a piece of microporous tape. This helps prevent unwanted microorganisms from entering the bag during colonization.
5. Cut a small opening and cover it with tape
The bag needs some gas exchange to support healthy mycelial growth during colonization. A small opening at the top of the bag allows gases to move in and out while the rice remains protected from contaminants.
First, disinfect your scissors with an alcohol wipe. Then, carefully cut a small triangle from one of the top corners of the bag. The opening should be large enough to allow gas exchange but small enough to cover completely with micropore tape. A simple way to determine the size is to keep the opening slightly narrower than the width of your tape.
Immediately cover the opening with micropore tape. The tape allows gas exchange while helping to prevent airborne contaminants from entering the bag, creating suitable conditions for the mycelium to colonize the rice.
6. Label the bag and begin incubation
After inoculation, label each bag with the species or strain and the date of inoculation. This makes it easier to keep track of colonization time and identify each bag later on.
To begin the incubation process, place the bags in a warm, stable location, ideally around 24–27 °C. Lower temperatures, such as 20–21 °C, can also support mycelial growth, although colonization will generally take longer. Avoid direct sunlight, excessive heat and significant temperature fluctuations.
Check the bags regularly during incubation to monitor their progress. Look for healthy mycelial growth as well as signs of possible contamination or stalled colonization. Regular checks make it easier to spot potential problems early.
7. Open the bags once they are fully colonized
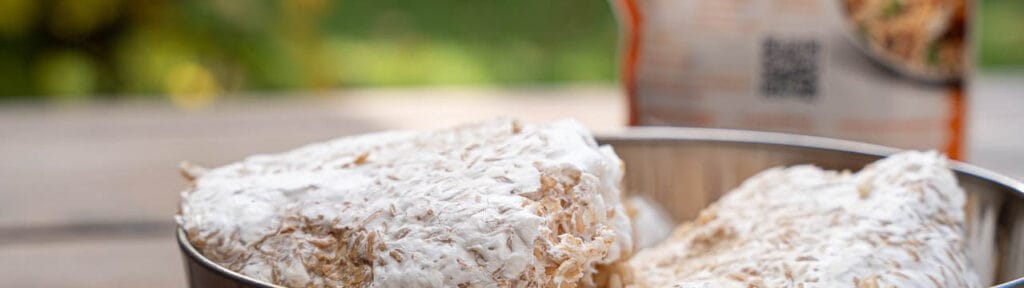
Open the bag once the rice appears to be fully colonized. You can monitor its progress through the window at the bottom of the bag and by gently feeling the bag from the outside. As colonization progresses, the rice will become covered in white mycelium and form a firm, consolidated mass. Under suitable incubation conditions, this process usually takes around two to three weeks.
As shown in the images below, a few individual rice grains may occasionally remain uncolonized even when the rest of the bag is ready. If this happens, simply remove these grains before using the colonized rice as spawn. A small amount of uncolonized rice does not necessarily mean that the rest of the bag cannot be used.
Unfortunately, contamination is not uncommon when using Uncle Ben’s Tek. For example, the rice bag pictured below fell on the floor during incubation, which may have contributed to contamination. Shortly afterwards, visible mold growth appeared through the window at the bottom of the bag.
8. Mix your spawn with bulk substrate or proceed directly to fruiting
Once the rice is fully colonized, you have two main options: mix the spawn with a bulk substrate or proceed directly to fruiting.
Option 1: Mix the colonized spawn with a suitable bulk substrate in a monotub or shoebox. A bulk substrate provides additional moisture and creates a larger growing medium for the mycelium to colonize, generally making it the preferred approach when aiming for a larger yield.
Option 2: Proceed directly to fruiting, either with or without a casing layer. A thin layer of suitable casing material can be added to the surface to help maintain favorable moisture conditions during fruiting.
The most suitable approach depends on your cultivation method, available space and desired result.
Tips for the best results
- Work as cleanly as possible. Choose a workspace with minimal air movement and thoroughly clean your work surface and supplies before starting. A homemade still air box (SAB) is an easy and inexpensive way to create a cleaner working environment at home.
- Inoculate more bags than you need. Preparing a few extra bags gives you some margin in case one or more become contaminated or fail to colonize properly.
- Check regularly for contamination. Use the transparent window at the bottom of the bag to monitor the rice for unusual colors or other signs of contamination. If a bag appears contaminated, separate it from the other bags to reduce the risk of spreading contaminants.
Conclusion
The Uncle Ben’s Tek is an accessible way to make mushroom spawn, though it is not the most reliable method. Due to the use of non-sterile procedures and the fact that the bags are often not 100% airtight, there is a real risk of contamination. Colonization is sometimes irregular, making it difficult to accurately assess progress.
Nevertheless, it is a good introductory method for those who want to experiment and learn the basics of mycelium growth.
For better results and more certainty, check out our articles on making rice spawn and rye spawn. Or, choose our sterilized rye in a grow bag with an injection port for a professional, safe, and consistent foundation for your next project.